Guide to Farming
From Hello Kitty Online Wiki
Contents |
Introduction
All players start with a free level 1 farm. Farms are a special type of zone called an instanced zone (see below). All farms, regardless of levels, have the same basic functionality: a place to plant crops, a spot to build a house, and a large storage area called the warehouse.
There are currently three different level farms: level 1, level 4 and level 8. To upgrade your farm to the next highest level, you need to purchase a farm certificate from the item mall for either Loyalty Points or Sanrio Cash Points. You also need to have the appropriate farming skill to match the level of the farm.
The level indicates the types of crops you can grow: a level 1 farm cannot grow level 4 seeds. To grow level 4 seeds, you need a level 4 farm and level 4 farming skill. The supported seed levels can be broken down:
- Level 1 farms can grow up to level 3 seeds
- Level 4 farms can grow up to level 7 seeds
- Level 8 farm can grow up to level 8 seeds. This is simply due to the fact that there are no seeds greater than level 8.
The level of the farm also indicates how big your growing field is, and the number of usable plots. A level 1 farm has approx. 50% non-usable field. A level 8 farm has 100% usable field.
To access your farm, you talk to the Farm Manager who is present in all cities. The Farm Manager for Sanrio Harbor is on the docks, next to the General Goods Manager; in all other cities, the Farm Manager is inside a special building called the Farm Market.
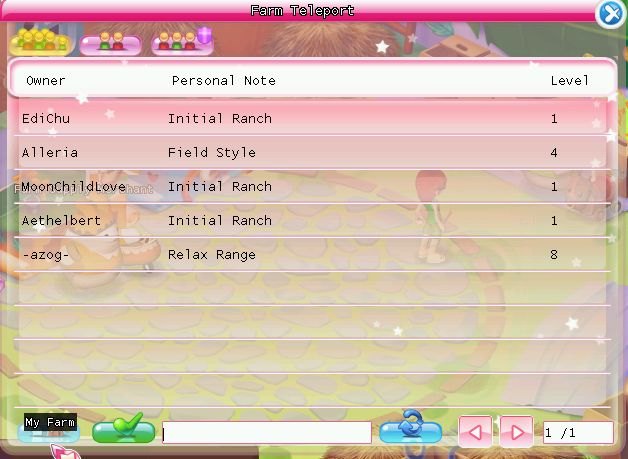
When you speak with the farm manager, a list of all active farms is displayed, and you have the choice to access your farm, or someone else's farm:
Press the My Farm button to access your farm.
If you wish to select another farm, chose the farm, and press the green Confirm button. The owner of the farm will be prompted to permit or deny your access to the farm. The request for access will automatically timeout after a short period, so if the owner is away from their computer, they may not not see the message.
Farm basics
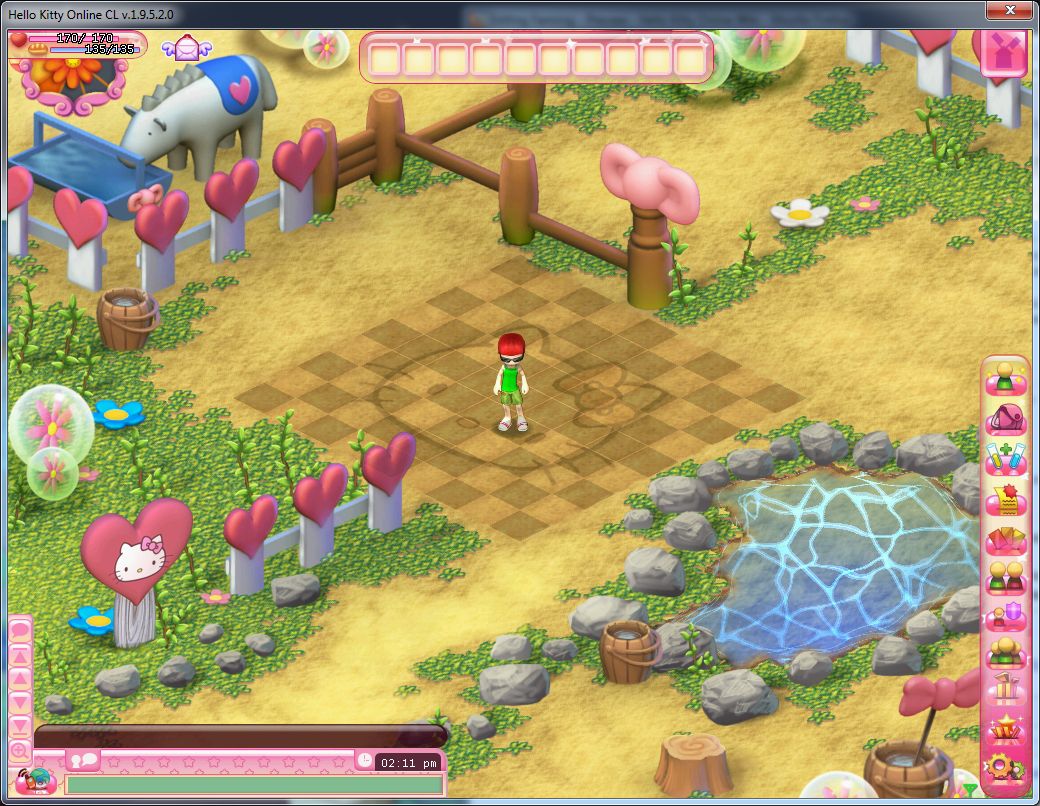
Once you are inside your farm, you'll see the main farm zone:
Take note of the following:
- In the upper right is a windmill icon. This is a drop-down menu that allows you to set a description for your farm and access your warehouse
- In the upper left is the time-of-day indicator. More on this later.
- If you have a house built, there will be an additional icon next to the windmill icon which permits house operations: locking the house, entering, and demolishing the house.
And in the middle of the screen is the farm field. The dark squares are non-usable plots which you cannot use.
Growing crops
One of the early quests in the Harbor is Learn to Cook, which requires 5 Potato and 5 Spinach. You can buy these at the General Goods Vendor, but it would be recommended to familiarize yourself with farming. You'll be spending a good portion of your time farming for quests, and once you become familiar with the process, it will become more enjoyable.
Now that you are in the farm, it's time to plant some crops. You will need three separate items, all of which you can purchase from the Farm Manager: you will need a stack of Fertilizer, a stack of Water Can and some seed of your choice.
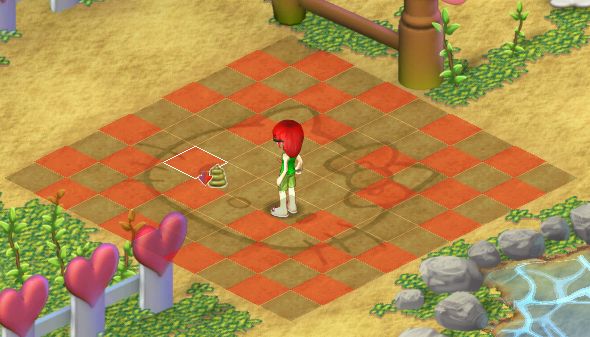
Like all actions in HKO, you use right-clicks. First, you need to lay down a bit of fertilizer, by right clicking on the stack of fertilizer. You will notice that the farm field now changes color. The red squares are suitable for farming, and the brown squares are not usable. If you try to place anything on the unusable plots, it will display an X thru the action icon:
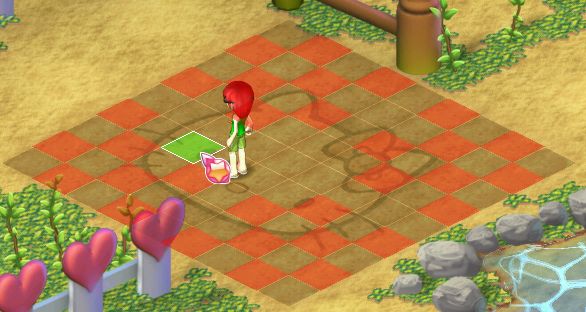
Lay down the fertilizer where you wish, and a single quantity of fertilizer will disappear, altho you will not see any immediate indication on the farm. Next, you lay down the seed by right-clicking on the seed in your inventory. Again, the farm field will change colors, and you are permitted to plant seeds only in places where you have fertilized, which now appear to be green:
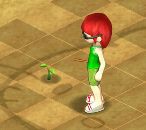
Once the seed is planted, you'll see the outcome, which is a tiny sapling or other indication that there is now a new crop here waiting to grow:
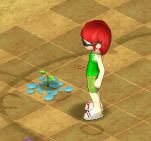
Now you need to place water on this new seedling, using the same mechanism as above: right-click on the watering cans in your inventory, and place the water on the new seedling. Please note that you can water any spot, even plots which are empty of fertilizer and water, so make sure you are choosing the right plot to water.
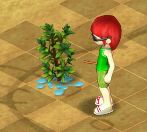
Your crop is watered, and now you need to wait for it to grow. In the beginning, you need to wait for two things to happen: waiting for it sprout, and then wait for it to be ready to harvest. After each harvest cycle, it will return to the "growing" state:
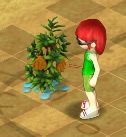
In a short while, the plant will sprout its produce, and then you can begin to harvest from it. This is what it looks like when it's ready to harvest:
You can see the difference between the growing stage and the harvesting stage by the produce on the crops. Now, just right-click on it, and "gather".
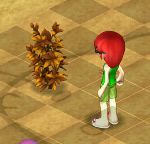
Once you've gathered five full times, it will return to the growing stage, and you must wait a little while for it to be ready to harvest again. Unlike plants in the wild, crops grown on your farm can be harvested for a total of six cycles, five gathers per cycle, for a total of 30 pulls per seed. Once the crops have been fully harvested, the crop dies, and you must chop it down to remove the dead crops.
The time of day
Now that you know how to grow crops, you need to be aware of the time of day. This is because crops require you to water them once a farm day.
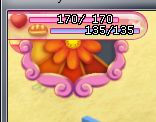
In the upper left is the time of day indicator:
You will see five slices of the "pie". Each slice of the pie is a 10 minute increment, and there are five slices, so a full farm day is 50 minutes. As each 10 minute increment elapses, a subsequent slice of the pie will change to a different hue of red; the black slices are times which have not elapsed. In this example, there are four slices colored in different hues of red, and the last slice is black, which means there are at least 10 minutes to go in this farm day. A quick glance at the time-of-day indicator will tell you how much time you have to go before you need to water. A good rule of thumb is that if it is "late evening" (all five slices are colored), you might just want to wait for the next day.
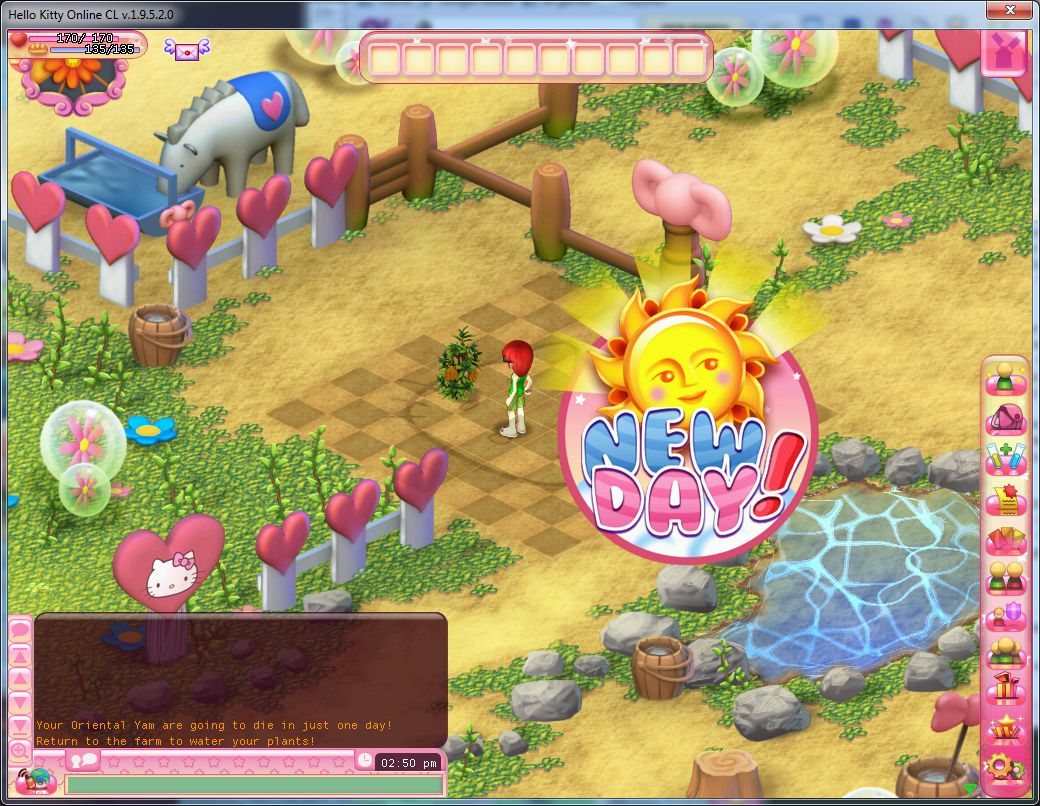
Why is all this important? Because once the day is over, all the water on your crops will disappear, and if you are still harvesting from them, you will need to re-water them. While you are on your farm, and a new day begins, an unmistakable message will tell you that the new day has begin, and you will also receive red system messages telling you to water your crops. If you do not water the crops by the time the next day begins, they will die.
The below screenshot illustrates a new day beginning on the farm: a "New Day" is displayed on the screen, the time-of-day indicator is now at "dawn", system messages are issued warning me to water my crops, and the water underneath the crops has now disappeared.
Time slows down while you are logged in to HKO but not on your farm, so if you decide to go out and quest, you do not need to worry about returning to the farm every hour; you will still receive system messages warning you about watering your plants. Farm time also ceases while you are not logged in to HKO, so you don't need to wake up at midnight just to water your valuable crops.
Keep note that if you harvest a plant to death before the end of the current day, that the water still remains. If you chop down the dead plant, and wish to plant in the same spot, all you need to do is fertilize the ground again. Fertilizer only lasts as long as the current plant is alive, while water will last the entire day period, even if there is no plant growing.
Moles
Mole Attacks
When you're on your farm, you'll randomly get a notification that moles will be coming in a few minutes. This gives you the chance to run out of the farm and ask players nearby if they can assist you with stunning them. Once they arrive, you'll see an alert on the crops that each mole will try to snatch. Right-click to stun each mole as they appear. After the wave of moles are done, a single Star Mole will appear that has a lot more energy than the regular moles.
These attacks tends to happen if you have a lot of crops planted whether dead or alive, so if you'd prefer avoiding them try not to plant too many at a time and keep your farm clean. Moles also appear to favor higher level plants, specifically Daikon.
Bugs
Scarecrows have lost their ability to prevent mole attacks and were removed from the shops and Item Mall.
A long-persistent bug in the game is sleeping moles which appear on player's farms. You will see these as soon as you enter your farm, as either regular moles or even a Star Mole, which is sleeping. These moles prevent players from performing any action on the farm; while the sleeping moles are present, player's cannot gather from their crops.
The best way to deal with the sleeping moles is to completely shut down your HKO game, wait a moment, and then log back in. If the moles continue to persist, the author of this guide will often reboot his computer and/or internet router.
Sometimes the regular Mole or Star Mole will be awake, so you may right-click it to put it to sleep. After this is done, you'll have to restart the game like you would with the sleeping moles.
A giant mole will also appear to parachute down onto your farm sometimes and run off with one of your plants. Unfortunately, this type of mole is not clickable so there's nothing we can do to prevent these attacks.
The warehouse
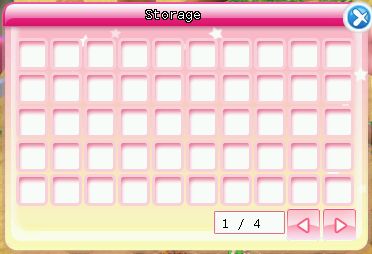
All players have the same size warehouse, regardless of level. This is a large storage spot, which has 4 pages of slots, each page with 50 slots, a total of 200 slots. Anything can be stored here:
Multiple deposits of the same items do not automatically re-stack to items already in the warehouse, so if you have a stack of 25 Clover in your warehouse, and attempt to put in another stack of 25, you will end up with two separate stacks of Clover.
Harvest Item List
Level 1 Seeds
Price: $5 Sold: Florapolis, London, Paris, Beijing
- Apple Seeds: Withered leaves, Apple, Caterpillar, Bad roots, Apple Tree Wood
- Snap Pea Seeds: Withered leaves, Caterpillar, Snap peas, Bad roots, Roots
- Oriental Yam Seeds: Oriental Yam, Withered leaves, Caterpillar, Bad roots, Roots
- Potato Seeds: Caterpillar, Potato, Withered leaves, Roots, Bad roots
- Corn Kernels: Corn, Caterpillar, Withered leaves, Bad roots, Roots
Food Sell Price: $4
Level 2 Seeds
Price: $10 Sold: Florapolis, London, Paris, Beijing
- Cherry Seeds: Cherry, Withered leaves, Caterpillar, Bad roots, Cherry Tree Wood
- Chestnut Seeds: Chestnut, Withered leaves, Caterpillar, Bad roots, Chestnut Tree Wood
- Lemon Seeds: Lemon, Caterpillar, Withered leaves, Bad lemon tree branches, Lemon Tree Wood
- Orange Seeds: Orange, Caterpillar, Withered leaves, Orange tree wood, Bad roots
- Strawberry Seeds: Strawberry, Caterpillar, Withered leaves, Bad roots, Roots
Food Sell Price: $5
Level 3 Seeds
Price: $15 Sold: London, Paris, Beijing
- Oat Seeds: Oats, Withered leaves, Bug, Bad roots, Roots
- Black Tea Seeds: Black Tea Leaves, Withered leaves, Caterpillar, Bad roots, Roots
- Coffee Beans: Coffee Fruit, Withered leaves, Caterpillar, Bad Wood, Magic Branches, Coffee Tree Wood
- Green Tea Seeds: Green Tea Leaves, Withered leaves, Caterpillar, Bad roots, roots
- Jasmine Tea Seeds: Jasmine Tea Leaves, Caterpillar, Withered leaves, Bad roots, Jasmin Tree Wood
Food Sell Price: $8
Level 4 Seeds
Price: $15 Sold: London, Paris, Beijing
- Red Onion Seeds: Red onion, Withered leaves, Caterpillar, Roots, Bad roots
- Cucumber Seeds: Cucumber, Caterpillar, Withered Leaves, Roots, Bad Roots
- Watermelon Seeds: Watermelon, Caterpillar, Withered Leaves, Roots, Bad Roots
- Lettuce Seeds: Lettuce, Caterpillar, Withered Leaves, Roots, Bad Roots
- Tomato Seeds: Tomato, Caterpillar, Withered Leaves, Roots, Bad Roots
Food Sell Price: $9
Level 5 Seeds
Price: $20 Sold: Paris, Beijing
- Oriental Cabbage Seeds: Oriental Cabbage, Caterpillar, Withered Leaves, Roots, Bad Roots
- Carrot Seeds: Carrot, Caterpillar, Withered Leaves, Roots, Bad Roots
- Hot Pepper Seeds: Hot Pepper, Caterpillar, Withered Leaves, Roots, Bad Roots
- Broccoli Seeds: Broccoli, Caterpillar, Withered Leaves, Roots, Bad Roots
- Sweet Potato Seeds: Sweet Potato, Caterpillar, Withered Leaves, Roots, Bad Roots
Food Sell Price: $10
Level 6 Seeds
Price: $20 Sold: Paris, Beijing
- Cantaloupe Seeds: Cantaloupe, Caterpillar, Withered Leaves, Roots, Bad Roots
- Peach Pit: Peach, Caterpillar, Withered Leaves, Roots, Bad Roots
- Banana Seeds: Banana, Caterpillar, Withered Leaves, Roots, Bad Roots
- Peanut Seeds: Peanut, Caterpillar, Withered Leaves, Roots, Bad Roots
- Button Mushroom Seeds: Button Mushroom, Caterpillar, Withered Leaves, Roots, Bad Roots
Food Sell Price: $11
Level 7 Seeds
Price: $25 Sold: Beijing
- Green Pepper Seeds: Green Pepper, Caterpillar, Withered Leaves, Roots, Bad Roots
- Cauliflower Seeds: Cauliflower, Caterpillar, Withered Leaves, Roots, Bad Roots
- Sugar Cane Seeds: Sugar Cane, Caterpillar, Withered Leaves, Roots, Bad Roots
- Apricot Pit: Apricot, Caterpillar, Withered Leaves, Apricot Wood, Bad Wood
- Garlic Seeds: Garlic, Caterpillar, Withered Leaves, Roots, Bad Roots
Food Sell Price: $12
Level 8 Seeds
Price: $30 Sold: Beijing
- Green Bean Seeds: Green Bean, Caterpillar, Withered Leaves, Roots, Bad Roots
- Grape Seeds: Grape, Caterpillar, Withered Leaves, Grape Vine, Bad Wood
- Daikon Seeds: Daikon, Caterpillar, Withered Leaves, Roots, Bad Roots
- Red Cabbage Seeds: Red Cabbage, Caterpillar, Withered Leaves, Roots, Bad Roots
- Shiitake Mushroom Seeds: Shiitake Mushroom, Caterpillar, Withered Leaves, Roots, Bad Roots
Food Sell Price: $13
See Also
Dream Carnival Farming
You are introduced to the Farm Constructor during the Farming 101 quest. He will provide you with some items to plant some Star Apples as your quest reward:
With these items, you are ready to enter your farm and begin farming!
Talk to the Farm Constructor and click on the "Farm Teleport" button on the right. You will now see the following screen:
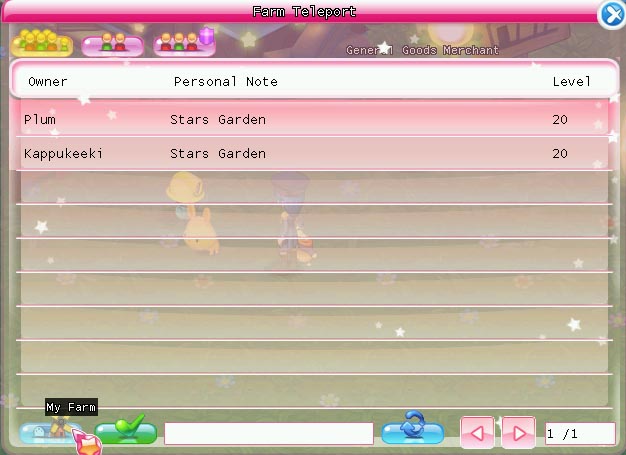
You can travel to your farm by pressing the "My Farm" button on the bottom-right corner, or visit another player's farm by selecting the player's name and pressing "Confirm".
Note: Dream Carnival farms are not linked to farms located in other cities.
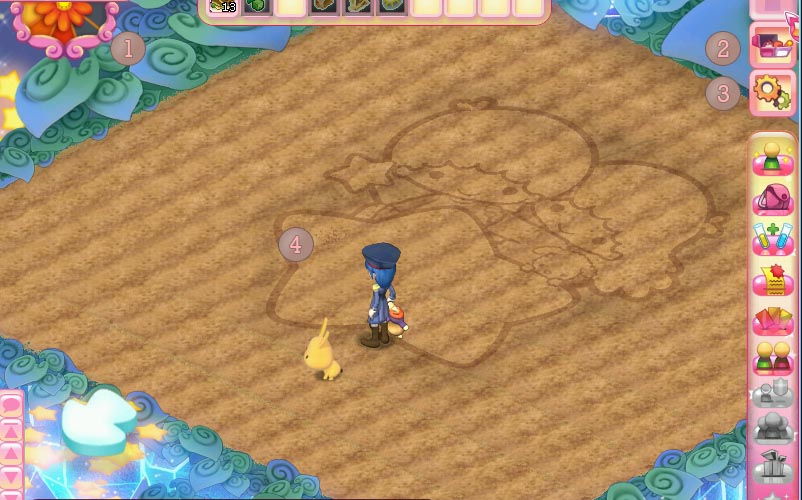
Farm Interface
1. Clock: This is used to inform you approximately how much time is left in a farm day. Currently, a farm day is 50 minutes and as time goes by, each slot will fill with color. Once you leave your farm, time will continue and will only stop once you log out of the game.
2. Storage: After hovering over the icon on the top-right corner of the screen, you will see the storage and settings buttons slide down. The storage is used to store any items you don't want to carry around in your inventory.
3. Settings: Write a personal note for your farm here. The personal note will show up on the farm list at the Farm Constructor once you hover the cursor over your name.
4. Field: This is the most important area of your farm, the place where you will be planting your seeds.
Growing Crops
Growing crops in the Dream Carnival is the same as regular farming with the exception of the items you are using.
